Start with the basics: check the power supply, cables, and signal chain before opening the pedal. In many cases, simple connection or power issues are responsible for the problem.
Most distortion and overdrive pedals can be diagnosed using the same basic troubleshooting steps, whether you’re using a simple stompbox or a more complex unit with multiple bypass and clipping options. Common issues include no power, no sound, noisy output, intermittent signal loss, or pedals stuck in bypass mode. Most of these issues can usually be resolved at home with a few basic tools and a methodical troubleshooting approach.
⚠️ SAFETY WARNING: Always disconnect the pedal from power before opening the enclosure. Never work on the pedal while it is powered on.
الوجبات الرئيسية
- Always start with power supply and cable checks – 80% of pedal problems are caused by these issues
- Most distortion pedals require a 9V DC center-negative power supply
- Clean input/output jacks regularly with contact cleaner to prevent crackling and signal loss
- Switch between true bypass and buffer bypass modes (if available) to isolate problems
- Test one change at a time to make troubleshooting faster and easier
- Know when to call a professional – complex repairs can damage your pedal permanently
Basic Tools and Initial Diagnosis
Required Tools and Safety Equipment
| Tool/Safety Precaution | الوصف |
|---|---|
| Soldering Iron | Use a 25-30 watt iron for pedal repairs |
| Multimeter | Measures voltages and checks continuity |
| Safety Glasses | Protects eyes from solder and debris |
| Contact Cleaner | Removes dirt and oxidation from jacks and switches |
| Screwdriver Set | For opening pedal enclosures |
Quick Problem Diagnosis
| Symptom | Most Likely Cause | First Step |
|---|---|---|
| No power / LED off | Bad power supply | Try a different 9V DC adapter |
| No sound | Loose cable or wrong bypass mode | Check cables and switch pedal on/off |
| Noisy / crackling sound | Dirty jacks | Clean input/output jacks with contact cleaner |
| Sound cuts in and out | Loose connection | Check all cables and solder joints |
| Only clean sound | Stuck in bypass mode | Check footswitch and wiring |
| Weak or thin sound | Low power or dirty connections | Test with an isolated power supply |
Basic Troubleshooting Steps
Power and Cable Checks
Power problems are the most common reason a distortion pedal stops working. Before opening the pedal, always start with the power supply and cables.
Follow these basic checks:
- Plug the pedal into a 9V DC center-negative power supply
- Use an isolated power supply to reduce noise and ground loop issues
- Avoid AC adapters or incorrect voltages, which can permanently damage the pedal
- Connect the pedal directly between the guitar and amplifier using known-good cables
Quick checklist:
- Is the power supply connected to a working outlet?
- Are the cables damaged, loose, or kinked?
- Do the plugs fit securely into the jacks?
- Does the LED turn on when the pedal is powered?
💡 PRO TIP: If the pedal supports batteries, try a fresh one before troubleshooting further. Weak batteries often cause weak output or intermittent operation.
Input and Output Connections
Loose or dirty connections can interrupt the signal and create unwanted noise.
Check the following:
- The guitar cable is fully inserted into the input jack
- The output cable fits securely into the output jack
- Moving the cables does not produce crackling or popping sounds
- The pedal is not accidentally left in bypass mode
Some modern pedals include both true bypass and buffer bypass modes:
- True bypass: Sends the clean signal directly through the pedal when switched off
- Buffer bypass: Helps preserve signal clarity over longer cable runs
Switching between these modes can help determine whether the issue is inside the pedal or elsewhere in the signal chain.
Volume and Signal Chain Check
Problems in the signal chain can sometimes look like pedal failure.
A quick signal chain test can help isolate the problem:
- Plug the guitar directly into the amplifier to confirm both are working properly
- Add only the distortion pedal between the guitar and amp
- Turn the pedal on and off while listening for changes in sound
- Test the pedal’s controls, switches, and modes one at a time
If the pedal works in one mode but not another, the problem may be related to the switch or internal wiring.
Common Distortion Pedal Problems and Fixes
No Power or LED Light
If the pedal shows no signs of power:
- Try another 9V DC center-negative power supply
- Inspect the power jack for loose connections or bent pins
- Check the power cable for damage
- Test whether the LED itself has failed
If the pedal still does not power on, the issue may be a damaged component or broken solder joint inside the pedal.
No Sound Output
If the pedal powers on but produces no sound:
- Confirm that all cables are connected correctly
- Make sure the pedal is not stuck in bypass mode
- Check the volume controls on the pedal, guitar, and amplifier
- Test all switches and knobs to confirm they are functioning properly
If there is still no sound, the problem may involve a faulty footswitch, broken wire, or damaged input/output jack.
Weak or Noisy Signal
Hum, buzz, static, or weak output are usually caused by power, grounding, or connection issues.
Common fixes include:
- Use a regulated isolated power supply
- Clean dirty jacks and switches with contact cleaner
- Replace damaged or poorly shielded cables
- Eliminate ground loops by avoiding cheap daisy-chain power supplies
If the noise continues, internal components such as capacitors, transistors, or solder joints may be failing.
Intermittent Cutting Out
If the pedal works inconsistently or cuts out randomly:
- Check for loose power connections
- Inspect cables for intermittent shorts or damage
- Wiggle the cables and footswitch while testing the pedal
- Look for loose wires or cold solder joints inside the enclosure
A loose connection often becomes obvious when the pedal is moved or lightly pressed.
Stuck in Bypass Mode
If the pedal only passes a clean signal:
- Test whether the footswitch clicks and engages properly
- Inspect the wiring connected to the footswitch and jacks
- Look for wires touching the metal enclosure and causing a short
- Verify that any footswitch breakout board is installed correctly
If the pedal works outside the enclosure but fails when reassembled, the problem is usually related to grounding or a short circuit inside the case.
Advanced Troubleshooting
Cleaning Input and Output Jacks
Dirty or oxidized jacks can cause crackling, weak signals, or intermittent sound loss. Dust and oxidation build up over time, especially on pedals used regularly for gigs or rehearsals.
To clean the jacks safely:
- Disconnect the pedal from power and audio cables
- Apply a small amount of electronics contact cleaner to the jack
- Insert and remove a cable several times to clean the internal contacts
- Allow the pedal to dry completely before powering it on again
Regular cleaning helps prevent noise, signal dropouts, and connection issues.
Inspecting Internal Components
If the pedal still does not work after basic troubleshooting, inspect the internal components carefully. Always work on a clean, static-free surface before opening the enclosure.
Check for:
- Loose or disconnected wires
- Burnt or damaged components
- Cold or cracked solder joints
- Damaged switches or loose jacks
A multimeter can help verify continuity and confirm the pedal is receiving proper voltage.
📌 NOTE: Cold solder joints often appear dull or cracked instead of smooth and shiny.
If you are not comfortable working with electronics or soldering, stop here and contact a qualified repair technician.
When to Seek Professional Repair
Some pedal problems require specialized tools and repair experience. Professional repair is recommended if:
- The pedal has water damage
- You notice a burning smell or burnt components
- The circuit board is physically damaged
- The footswitch or power section requires replacement
- The pedal is still under warranty
Attempting complex repairs without proper experience can permanently damage the pedal.
الخاتمة
Most distortion pedal problems are easy to fix at home with basic tools and a little patience. Always start with the simplest solutions – check your power supply, cables, and connections before opening the pedal.
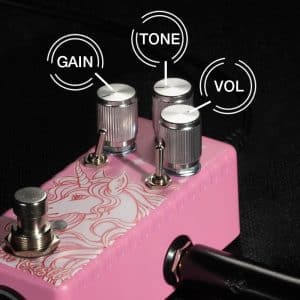
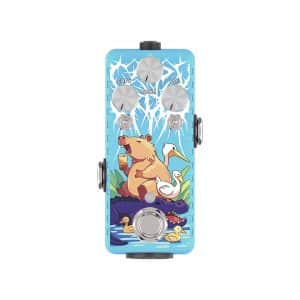
For pedals with advanced features like dual bypass modes and multiple clipping options (such as the Musontek Dream Castle Overdrive), understanding how these features work will make troubleshooting much easier. Most issues can be resolved by cleaning the jacks, checking the power supply, or tightening loose connections.
If you’re not comfortable working on electronics, don’t hesitate to contact a qualified technician or the manufacturer for support.
الأسئلة الشائعة
Why does my distortion pedal make a loud pop when switched on?
This is usually caused by static electricity or a sudden change in DC voltage. You can reduce popping by using an isolated power supply and ensuring your setup is properly grounded.
How often should I clean my pedal’s jacks and switches?
Musicians who play gigs regularly should clean once a month. Home players can clean every three months. Always use a dedicated electronics contact cleaner.
What power supply should I use for my distortion pedal?
Most distortion pedals use a 9V DC center-negative power supply. This is the industry standard, but always check the label on your pedal to be sure. Avoid cheap unregulated power supplies, as they cause noise and can damage your pedal.
Can distortion pedals run on batteries?
Some pedals can run on batteries, but many modern models (including the Musontek Dream Castle Overdrive) do not have battery compartments. Check your pedal’s manual for specific information.
What do the mode and clip switches do on overdrive pedals?
Mode switches typically select between different voicings (such as Modern or Vintage tones). Clip switches change the type of clipping circuit, which affects the hardness and character of the distortion.